| Help TOC > Instructions for DEX developers > Software > PuTTY
|
| PuTTY |
Date: 2008/02/26 10:47:32
Revision: 1.9
|
PuTTY is a software suite for authentication.
In order to create a safe connection to Sourceforge.net, such a software is needed.
The PuTTY suite can be downloaded from,
(http://www.chiark.greenend.org.uk/~sgtatham/putty/)
Look in the 'Download' section and chose files depending on your environment.
These files are required,
- PuTTY.exe - (a Telnet and SSH client)
- Plink.exe - (a command line interface to PuTTy)
- Pageant.exe - (an SSH autentication agent)
- PuTTYgen.exe - (an RSA and DSA key generation utility)
This page contains a number of sub-sections;
None of the download files need any installation.
They are all executable in the format they are downloaded.
A public/private key pair needs to be generated,
which will be used for authentication on Sourceforge.net.
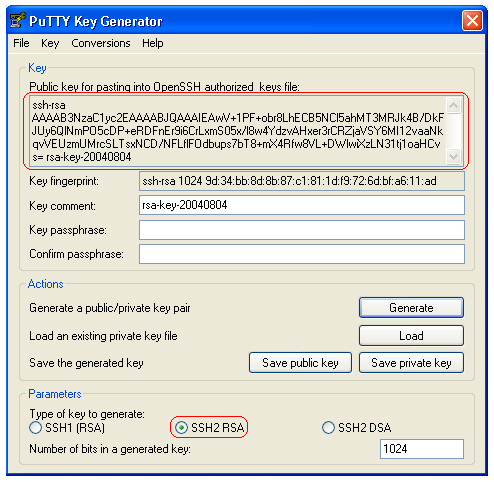
- Run 'PuTTYgen.exe' from the folder where you saved it, e.g. by double-clicking it.
Figure 1 — The PuTTYgen application.
-
Make sure that 'SSH2RSA' is chosen in the Parameters section of the window that has
opened up.
-
Click the 'Generate button'.
- type in your preferred password in "Key passphrase" field.
- retype your preferred password in "Confirm passphrase" field.
- keep a record of your password.
- save the private key as, e.g. 'priv_key' in your PuTTY-folder.
- save the public key as, e.g. 'pub_key' in your PuTTY-folder.
-
Note that the chosen password is a local password on your own machine
that allows you access to your keys.
-
Close the 'PuTTYgen' application.
You will have to complete the actions described in this step every time you use WinCVS.
These steps are also included in the guide on how to download,
work with, and upload DEXlib and STEPmod on Sourceforge.net
- Run 'pageant.exe'. An icon (a computer with a hat...) will appear in your
lower toolbar. No dialogue box will appear on your screen, only the icon.
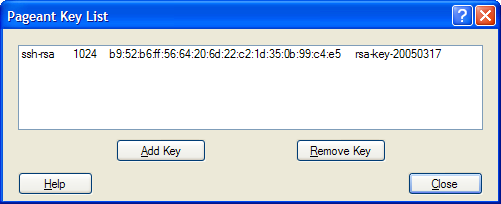
- Double click on this icon.
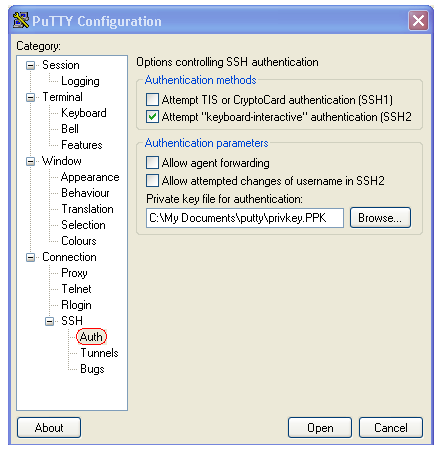
Figure 2 — The Pageant application.
- Click on the 'Add Key' button.
- Browse to the folder where you saved your key pair, select your private key (file ends
with .PPK) and click on the 'Open' button.
- Type in the password you chose in step 4, and click on the 'OK' button. Your key should
appear in the Pageant window.
- Close the Pageant window. Note that the icon still is on your toolbar and the program
active. If you right-click on the icon and chose 'Exit' from the pop-up menu, the
Pageant application will close and you will not be able to log into DEXlib or STEPmod
with WinCVS.
- Run 'putty.exe' from your PuTTY folder. The PuTTY Configuration window should appear
on your screen.
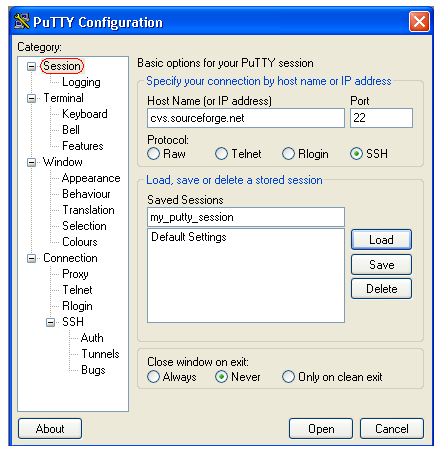
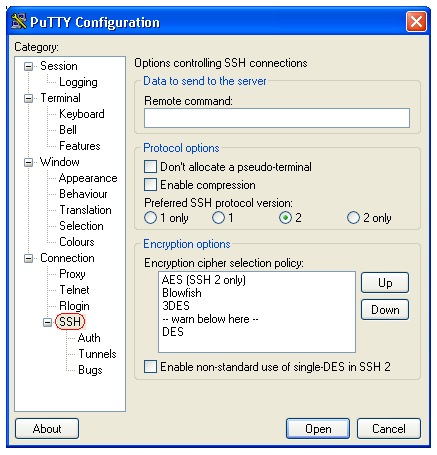
Figure 3 — The PuTTY Configuration window and the 'Session' section.
- Open the 'Session' section if it's not already open.
- Type "cvs.sourceforge.net" in the 'Host Name (or IP address)' field.
- Type "22" in the 'Port' field (if necessary).
- Select "SSH" (if necessary) in the 'Protocol:' dialogue.
- Type a name for your PuTTY session in the 'Saved Sessions' field, e.g.
"my_putty_session".
- Check "Never" in the 'Close window on exit:' dialogue.
- Save your PuTTY session.
- Close PuTTY by clicking on the 'Cancel' button.
- Run 'putty.exe' again and load your created session ("my_putty_session").
- Open the 'Session' section again and save the changes you've made to your PuTTY session.
- Close PuTTY by clicking on the 'Cancel' button.
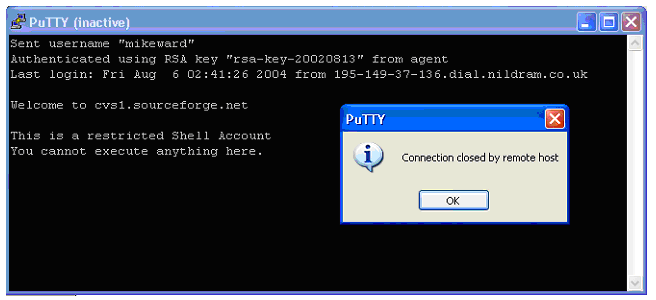
This setup and test only needs to be performed once.
Though, if you later on experience authentication problems,
it could be a good idea to run this test again.